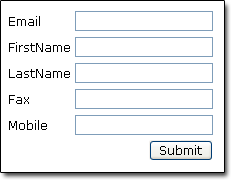
| Opt-In Form |

Select the fields: The table lists all the fields available in the mailing list. The first step is to select the fields that the new subscriber will have to fill out in the form. For each field, you can choose if it is:
- Mandatory: The field will appear in the subscription form. If the subscriber does not provide this information, a message will tell him that this information is mandatory.
- Optional: The field will appear in the subscription form but the subscriber does not have to provide this information.
- Do not ask: The field will not appear in the subscription form.
Redirection URL: Once the new subscriber has submitted the form, he will be redirected to the URL indicated here.
If you want to redirect the new subscriber to a "Welcome" page,
follow these steps:
- Create a new page on you web site called, for instance,
"welcome.html".
- Enter the text of your "welcome" page. It is recommended to inform the new subscriber that he will receive a message to
confirm his subscription. Note that you can personalize this page by
using the informations provided by the new
subscriber. Indeed, all available parameters are added to the
Redirection URL.
- Under Redirection URL, enter the link to the "welcome"
page (e.g.:
http://www.mycompany.com/welcome.html).
| Confirmation Message |
Note that the confirmation message contains a link that should not be deleted: "To confirm that you do want to join, click here" . Indeed, it contains the information for your system to identify the subscriber and confirm the opt-in process.
| Queue Settings |
The application receives the information on a new subscriber within an email sent to the address indicated here.
In order to allow the application to receive this message, you must associate your project with the appropriate incoming queue. Note that incoming queues are configured in the application server and allows the application to retrieve messages from your mail server (POP3 server or file).
| Opt-In Management |
The Web Form Code: In order to display the subscription form within your website, you must copy all the code located in the text area and paste it within your web site HTML code (it has to be between the <body> and </body> tags).
Rules: The rules for updating automatically your mailing list are created. They are displayed in the Rules page.